
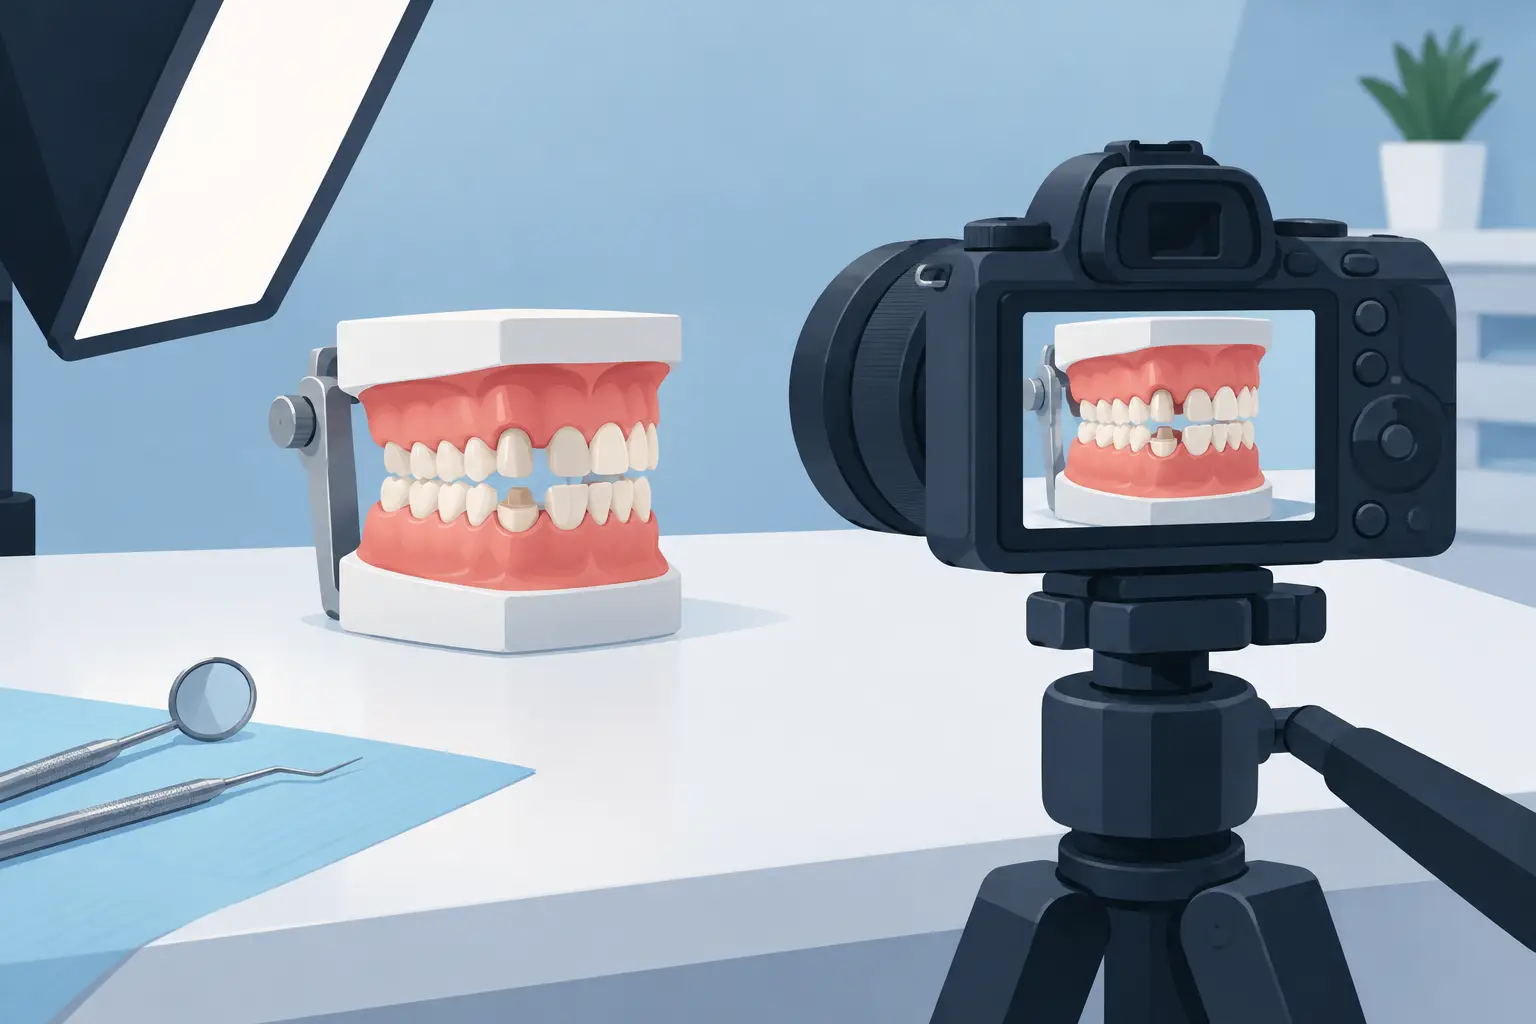
How to Photograph Typodont Preparations Well
A preparation can look acceptable from your handpiece position and still lose points when viewed from the wrong angle. Learning how to photograph typodont preparations gives you a disciplined way to inspect your own work before an evaluator sees it. Clear images reveal what bench exam pressure can hide: unsupported enamel, uneven reduction, a wandering finish line, excessive taper, or a proximal wall that was never fully cleared.
For internationally trained dentists preparing for U.S. bench exams or advanced standing admissions, photography is not simply documentation. It is part of the feedback process. A consistent photo set lets you compare your preparation against a rubric, identify repeatable errors, and submit work that a faculty reviewer can evaluate accurately.
Why Typodont Photography Affects Your Preparation Review
Bench exam evaluators inspect preparations from multiple directions. They assess the finish line, axial reduction, occlusal or incisal clearance, taper, path of draw, adjacent-tooth protection, and overall form. A single overhead image cannot show all of those criteria.
Poor photography creates uncertainty. Shadows can make a margin look rough when it is smooth. A tilted camera can make a preparation appear over-tapered or under-reduced. Reflections from a wet surface can conceal a lip or sharp internal line angle. If a reviewer cannot clearly see the relevant feature, the feedback may be limited to what the image supports.
Your goal is not to make the preparation look better than it is. Your goal is to make it visible, repeatable, and easy to judge. That standard protects the value of every practice submission.
Set Up a Simple, Repeatable Photography Station
You do not need a complex studio to produce useful typodont photographs. You need control over three variables: stabilization, lighting, and orientation. Once these are consistent, your images become much more reliable from one preparation to the next.
Place the typodont on a stable surface at a comfortable height. Use a plain, nonreflective background in a neutral color. White, light gray, or matte black can work, but choose one and use it consistently. A distracting countertop, patterned towel, or glossy surface pulls attention away from the preparation and may interfere with exposure.
Clean and dry the typodont before photographing. Remove composite dust, pencil marks, water droplets, and debris from the preparation and adjacent teeth. A dry field is especially important for margin evaluation because moisture and glare can obscure the finish line.
Choose a Camera That Lets You Focus Closely
A smartphone can be sufficient if it focuses sharply at close range and you use good lighting. Use the main rear lens rather than a low-quality digital zoom. If your phone has a dedicated macro mode, test it carefully. Some macro settings introduce distortion or shift focus unpredictably, especially near reflective plastic surfaces.
A DSLR or mirrorless camera with a macro lens provides more control, but it is not automatically better. If the setup is difficult enough that you avoid using it, it will not improve your training. For most learners, a stable smartphone setup with controlled lighting produces images suitable for practice review.
Avoid holding the camera freehand whenever possible. A small tripod, phone clamp, or stable support reduces motion blur and helps you duplicate the same angle. Consistency matters more than expensive equipment.
Use Diffused Light, Not Harsh Light
Direct overhead light often creates bright reflections on typodont teeth and deep shadows at the gingival margin. Use soft, diffused light from two sides of the typodont when possible. Two small lamps positioned at roughly equal angles can reduce shadows without flattening the anatomy completely.
If you use one light source, move it until the finish line is visible without a strong glare across the axial wall. A sheet of white paper, thin fabric designed for diffusion, or a small light diffuser can soften harsh light. Do not rely on heavy image editing to correct poor lighting. Editing may change contrast and make margins harder, not easier, to assess.
How to Photograph Typodont Preparations From the Right Angles
A complete photo set should show the preparation the way an examiner would inspect it. The exact views depend on the tooth and procedure, but the principle remains the same: every image should answer a specific evaluation question.
Start by positioning the typodont so the preparation is centered in the frame. Fill most of the image with the prepared tooth and its adjacent teeth, leaving enough surrounding structure to orient the viewer. If the preparation is too small in the frame, fine details such as margin continuity and proximal clearance become difficult to assess.
Keep the camera lens as perpendicular as possible to the surface you are evaluating. This reduces perspective distortion. When photographing occlusal reduction, place the camera directly above the occlusal table. When documenting a buccal or lingual wall, align the lens with that wall rather than shooting downward from a random angle.
For most crown preparations, capture a standardized series of views:
- Occlusal or incisal view to assess reduction pattern, functional cusp bevel where applicable, and internal form.
- Buccal and lingual views to inspect finish-line continuity, axial reduction, wall height, and overall taper.
- Mesial and distal views to evaluate proximal clearance, damage to adjacent teeth, and wall convergence.
- A path-of-draw view aligned with the intended long axis of the preparation.
For anterior preparations, add a true incisal view and views that clearly demonstrate facial and lingual reduction. For posterior preparations, ensure the occlusal image shows the functional cusp bevel and remaining occlusal anatomy clearly. A full-arch or quadrant image may also be useful when the relationship to adjacent and opposing teeth affects the assignment.
The Path-of-Draw View Requires Extra Attention
The path-of-draw image is often where camera positioning makes the greatest difference. If the lens is not aligned with the proposed path of insertion, walls can appear to converge or diverge inaccurately.
First, decide what the intended path of draw should be based on the preparation and adjacent teeth. Then stabilize the typodont and move the camera until you are looking along that path. Inspect the image for undercuts, excessive taper, and asymmetry. If you cannot see the full margin or if one wall blocks another unexpectedly, do not assume the issue is photographic. Recheck the preparation from the same direction.
This is a useful self-audit habit. A photograph that reveals an undercut before submission gives you an opportunity to correct it before the error becomes part of your performance pattern.
Control Focus, Exposure, and Color
Tap or manually select focus on the finish line or the area being evaluated. If your camera focuses on the adjacent tooth, the preparation may look soft even when the overall image appears acceptable. Take a moment to zoom into the image before moving on. A photo that looks sharp on a phone screen may be unusable when reviewed on a larger monitor.
Avoid flash when possible. Built-in flash commonly produces a bright hotspot and strong shadow behind the typodont. If flash is your only option, diffuse it and test several positions, but continuous soft light is easier to control.
Use moderate exposure. Overexposure can erase the contrast between a chamfer or shoulder and the unprepared tooth surface. Underexposure hides detail within the preparation. If your phone allows exposure adjustment, lower it slightly when the plastic teeth look washed out.
Color accuracy matters less than clarity, but extreme yellow, blue, or green lighting can make the image distracting and may obscure details. Set your lighting once and avoid mixing several color temperatures in the same photo.
Review Each Image Like an Evaluator
Do not photograph, upload, and move on. Build a brief review step into every practice session. Open each image at full size and ask whether it proves the feature you intended to show.
Look for a continuous, smooth finish line. Check whether the margin is visible around the entire tooth or hidden by shadow. Assess whether axial walls are smooth and appropriately tapered. Confirm that occlusal reduction is even enough to support restorative material requirements without unnecessary loss of tooth structure. Examine proximal areas for clearance and accidental damage to adjacent teeth.
Photography cannot replace direct visual inspection or measurement. A reduction guide, periodontal probe, reduction bur reference, and your actual bench rubric remain essential. Images are strongest when they support a disciplined evaluation process rather than substitute for one.
If the photograph exposes a concern, correct the preparation and photograph it again. Keep both images when you are training. Comparing the first attempt with the corrected version makes progress visible and helps you recognize recurring technical issues.
Create a Submission Protocol You Can Repeat
For faculty-reviewed training, label images clearly and submit them in the requested sequence. Ambiguous file names and mixed angles slow down review and increase the chance that a critical view is overlooked. Use a consistent format such as your name, assignment, tooth number, attempt number, and view.
Before submitting, verify that every required angle is included, every image is in focus, and the typodont is clean. Do not crop so tightly that the reviewer loses orientation, but do not submit distant images where the preparation occupies only a small portion of the frame.
At Global Dental Elites Academy, structured submission and faculty feedback are designed to help candidates connect what they see in their work with the standards used to evaluate it. Strong photographs make that feedback more specific, which makes your next resubmission more productive.
Common Errors That Reduce the Value of Your Photos
The most common mistake is relying on one attractive angle. A preparation may look smooth from the occlusal view while the proximal margin remains irregular. Another frequent error is photographing a wet or dusty typodont, which creates reflections and masks detail.
Some candidates use wide-angle phone lenses from too close a distance. This exaggerates the nearest wall and distorts the preparation form. Step back slightly, use optical zoom only if your device supports it well, or crop after taking a sharp image. Freehand images taken in low light can also blur fine margin detail, even if the broader tooth shape looks clear.
Finally, do not adjust contrast, sharpness, or filters aggressively. Minor cropping or brightness correction may be acceptable for organization, but the photo should represent the actual preparation. A reviewer needs to see the work honestly to give feedback that improves performance.
A reliable photo set becomes part of your bench exam discipline: prepare with intention, inspect from every relevant view, document clearly, and correct what the evidence shows. That habit builds the visual judgment you need when every detail of the preparation is being evaluated.

You May Also Like

Understand foreign dentist eligibility for U.S. licensure, advanced standing programs, and bench exams with a focused, standards-based preparation plan.
-
-
October 26, 2026
Virtual dental education for internationally trained dentists: learn U.S. bench standards, submit work for faculty review, and improve with purpose...
-
-
October 24, 2026

Are virtual bench courses effective? Learn how faculty feedback, rubric-based practice, and resubmission build U.S. dental bench exam readiness today.
-
-
October 22, 2026