

How to Record Clinical Submissions for Bench Exams
A clinical submission is more than proof that you completed an assignment. When you record clinical submissions for bench exam preparation, your video becomes the evidence a faculty reviewer uses to assess your preparation design, hand skills, sequence, posture, and final result. A technically acceptable preparation can still be difficult to evaluate if the camera angle is poor, the margins are hidden, or the specimen is not presented clearly.
For internationally trained dentists, this matters because U.S. bench exams assess work against defined standards. The goal is not simply to show that you know how to prepare a tooth. You must demonstrate controlled execution that can be measured against expected dimensions, reduction, taper, smoothness, margin quality, and preservation of tooth structure.
Why Clinical Submission Quality Affects Your Feedback
Faculty feedback is only as specific as the evidence in front of the reviewer. If a video does not clearly show the occlusal surface, axial walls, finish line, and proximal contacts, the reviewer may identify a concern but cannot reliably judge its full extent. That can slow your improvement cycle.
A clear recording allows feedback to move beyond general comments such as “improve taper” or “reduce more occlusally.” Instead, it can address the actual clinical issue: whether one wall is over-tapered, whether functional cusp reduction is inadequate, whether a shoulder is uneven, or whether a margin has unsupported enamel.
This is especially valuable when you are adapting established clinical habits to U.S. dental school and bench exam expectations. In practice, dentists often make decisions based on the clinical situation, patient limitations, and restorative plan. In a bench exam environment, the work must meet a narrower rubric under time pressure. Recording each assignment correctly helps you train to that standard with less ambiguity.
Prepare Before You Start Recording
Do not wait until the preparation is complete to think about your submission. Plan the recording setup before you pick up the handpiece. A consistent setup makes it easier for faculty to compare one attempt with the next and helps you recognize whether your changes are producing measurable improvement.
Use a stable phone mount, tripod, or fixed recording support. Handheld video introduces movement that can distort the appearance of margins and axial walls. Position your typodont or mounted tooth so the camera can capture the preparation without your hands blocking the view. Good lighting is equally important. Shadows can make a smooth margin look irregular or conceal a thin area of reduction.
Before beginning, confirm that the tooth number, preparation type, and assignment requirements are identifiable. If your training program requests specific views, follow that format exactly. Standardization is not a minor administrative detail. It is part of disciplined exam preparation.
A reliable pre-recording check includes four elements:
- The camera lens is clean and the image is in focus.
- The typodont is stable and fully illuminated.
- The entire preparation can be viewed from multiple required angles.
- The audio, if needed for your assignment, is clear and free of distracting background noise.
Record the Procedure With a Reviewer’s Perspective
A common mistake is recording only the final preparation. The final result is essential, but the procedural sequence can also reveal why an error occurred. If your assignment requires a demonstration of technique, capture the major stages in an orderly way: depth orientation, reduction, axial preparation, margin formation, refinement, and final evaluation.
Keep the video focused on the procedure rather than trying to create a polished social-media presentation. Faculty reviewers need visual access to your work, not dramatic editing. Record at a pace that makes your steps understandable. If you move too quickly, the video may not show bur control, preparation direction, or how you establish critical features.
At the same time, avoid creating excessively long videos when a concise recording will show the required criteria. The right length depends on the assignment. A demonstration assignment may require more procedural footage, while a final evaluation submission may depend primarily on well-recorded close-up views. Follow the course instructions rather than assuming one format works for every exercise.
Your camera position should change as needed to show the areas that matter. An occlusal view helps evaluate reduction and outline form. Buccal, lingual, mesial, and distal views help reveal taper, convergence, wall height, finish-line continuity, and proximal clearance. Use close-up shots, but do not get so close that the reviewer loses orientation.
Show the Details That Bench Rubrics Measure
The strongest clinical submissions make the grading criteria visible. This requires more than turning the typodont slowly in front of the camera. Present the preparation deliberately, with each view serving a purpose.
For a crown preparation, show the occlusal surface clearly enough to assess reduction and functional cusp clearance. Then show the axial walls and finish line from each relevant direction. Hold each view steady for a moment. A reviewer should not need to pause repeatedly or guess whether an irregularity is a shadow, a camera artifact, or a genuine defect.
Pay close attention to the margin. Bench exam evaluators look for continuity, smoothness, proper configuration, and preservation of sound tooth structure. If the finish line is hidden by a finger, mirror glare, or low lighting, the most important part of the preparation may not be assessable.
For restorative preparations, document the features specified by your exercise. Depending on the procedure, that may include outline form, internal angles, pulpal or axial depth, retention features, proximal box design, cavosurface margins, or matrix adaptation. The exact standard changes by procedure and school, which is why rubric-based training is more useful than relying on a generic recording routine.
Avoid the Submission Errors That Create Unnecessary Uncertainty
Poor recording can make good work look questionable. The most frequent issue is insufficient lighting, followed closely by a camera angle that hides the margin or proximal area. A blurry lens, an unstable typodont, and fast movement can create the same problem: the reviewer cannot assess the feature with confidence.
Another mistake is submitting a video before conducting your own evaluation. Use the recording as a quality-control tool. Watch it once as though you were the evaluator. Can you see every margin? Are the views stable? Does the preparation appear symmetrical where it should be? Is there an area that looks under-reduced, over-tapered, rough, or unsupported?
Self-review does not replace faculty evaluation. You may not yet recognize every issue that a calibrated reviewer sees. But it prevents avoidable problems and develops the habit of inspecting work against criteria rather than relying on a quick visual impression at the bench.
Turn Feedback Into a Better Resubmission
The value of a submission system is not in uploading a video once. Progress comes from the cycle: perform, record, receive feedback, correct, and resubmit. Each round should target the specific issue identified by faculty rather than repeating the procedure in the same way and hoping the result improves.
When you receive feedback, separate the comments into preparation design, technical execution, and presentation. A design issue might involve inadequate reduction or improper taper. An execution issue might be a rough margin caused by bur control. A presentation issue might be a video angle that prevented full assessment. Correcting all three matters, but the clinical deficiency should receive your greatest attention.
Before resubmitting, state the change you made for yourself in one direct sentence: “I reduced the functional cusp further and verified clearance from the occlusal view,” or “I refined the lingual margin using a smaller bur and recorded a closer lingual view.” This keeps the next attempt intentional.
Global Dental Elites Academy structures this process around faculty-led demonstrations, assignment review, and resubmission cycles because repeated, calibrated correction is how clinical performance becomes more predictable. Watching a demonstration can clarify the target. Applying feedback to your own work is what builds control under exam conditions.
Build a Recording Routine Before Exam Day
Your recording routine should become efficient enough that it does not compete with your preparation time or attention. Practice setting up the camera, positioning the typodont, and presenting each view until the process feels automatic. The purpose is not to rehearse for a video production. It is to create a repeatable system for documenting and evaluating your clinical work.
Bench exam readiness is built through visible evidence of improvement. Record carefully, present the criteria clearly, and treat each faculty comment as a precise instruction for the next attempt. When your submissions consistently show work that meets the standard, you are no longer guessing whether you are ready to perform under evaluation.
You May Also Like

Understand foreign dentist eligibility for U.S. licensure, advanced standing programs, and bench exams with a focused, standards-based preparation plan.
-
-
October 26, 2026
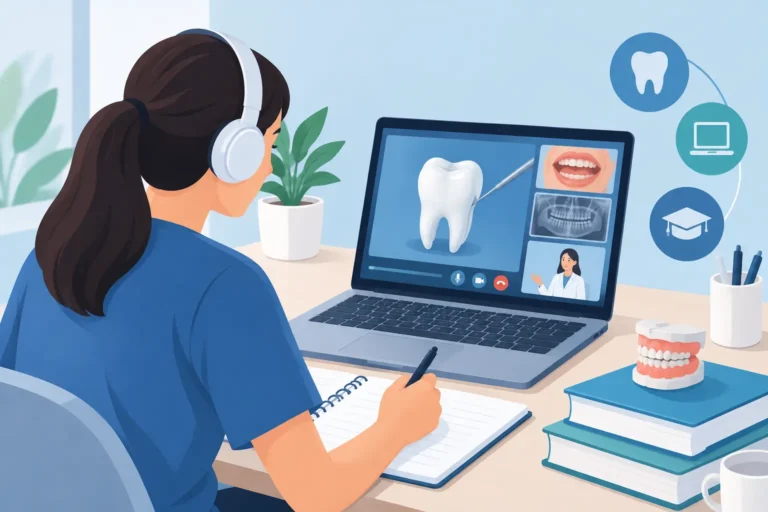
Virtual dental education for internationally trained dentists: learn U.S. bench standards, submit work for faculty review, and improve with purpose...
-
-
October 24, 2026

Are virtual bench courses effective? Learn how faculty feedback, rubric-based practice, and resubmission build U.S. dental bench exam readiness today.
-
-
October 22, 2026